Risk policies in Microsoft Entra ID Protection provide automated responses to potential security threats by evaluating user risk and sign-in risk. User risk refers to the likelihood of a compromised account, while sign-in risk measures the probability that a specific authentication attempt is suspicious. These policies are essential for proactively identifying and mitigating identity-based threats.
To enable and configure user risk policies, follow these steps:
1. Navigate to the Microsoft Entra ID portal and access the Identity Protection settings as a Global Administrator.
2. Under Manage, click Security > Protect > Identity Protection > User Risk Policy.
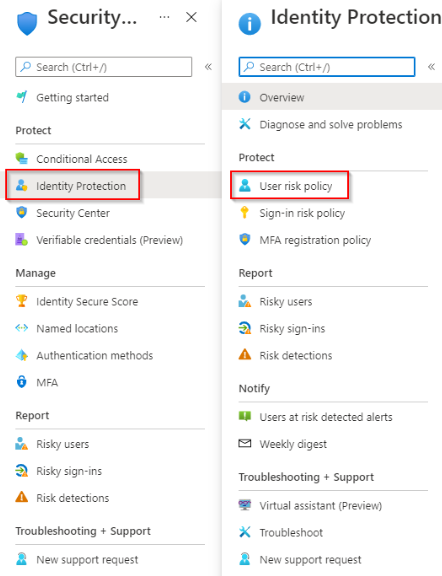
Navigate to user risk policy configuration page via Identity Protection (source)
3. Click All users > Exclude > 0 users and groups selected and click Select.
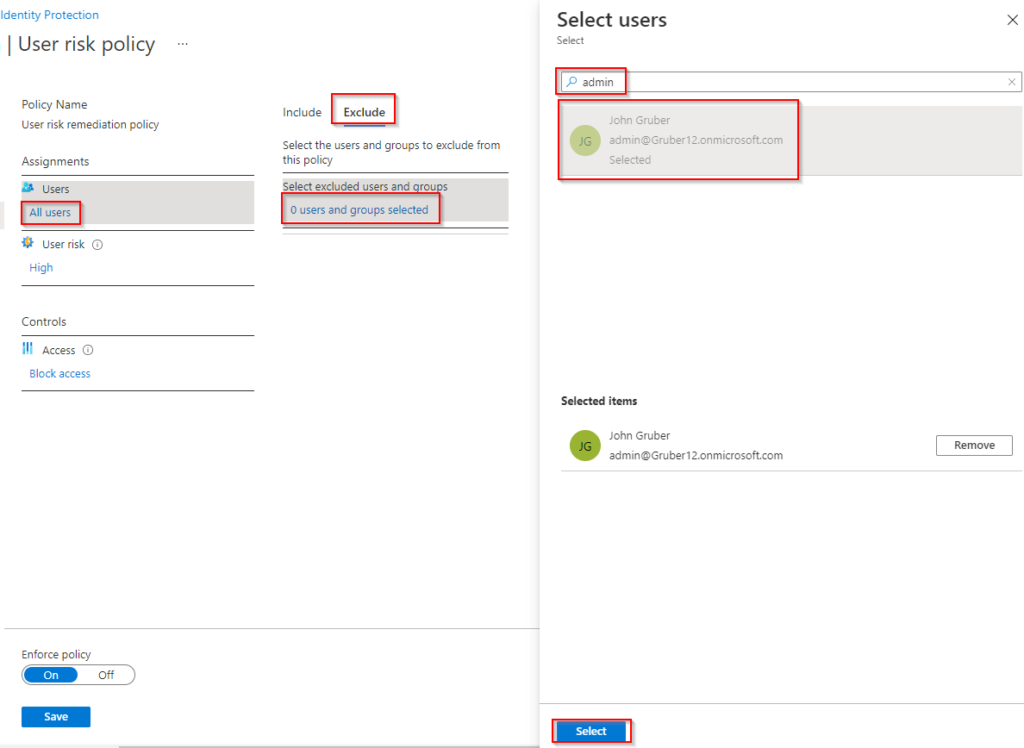
Configure user risk policies for all users. (source)
We may also exclude members in this step, but we wouldn’t recommend doing this as it introduces a risk attackers can exploit.
4. Click Low and above (original value found under User risk). Click High > Done.
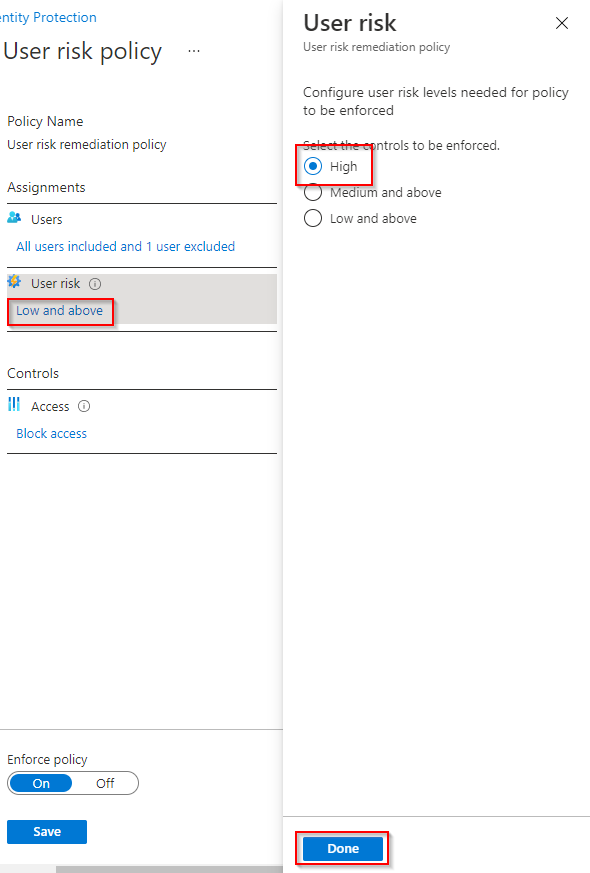
Enabling High risk on user risk policies (source)
5. Click On (original value Off found under Enforce policy). Click Save.
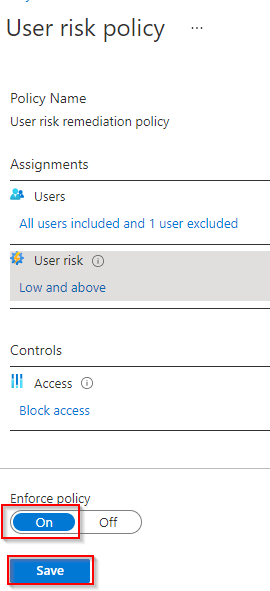
Enabling the user risk policy enforcement (source)
To enable and configure sign-in risk policies, follow these steps:
1. Navigate to the Microsoft Entra ID portal and access the Identity Protection settings as a Global Administrator.
2. Under Manage, click on Security > Protect > Identity Protection > Sign-in Risk Policy.
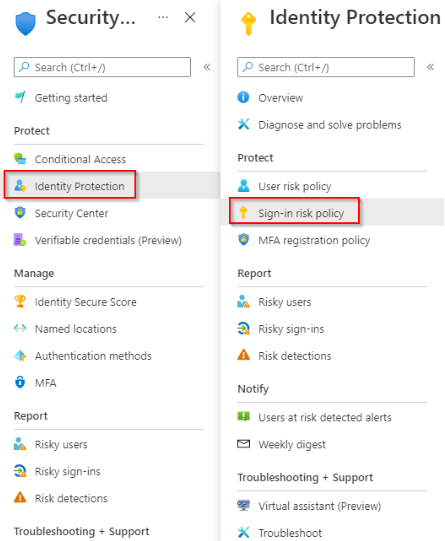
Navigate to Sign-in risk policy configuration page via Identity Protection (source)
3. Click All users > Exclude > 0 users and groups selected and click Select.
Configure sign-in risk policies for all users. (source)
Like user risk policies, you can exclude members from this step, but we don’t recommend doing this for the same reason.
4. Click Low and above (original value found under Sign-in risk). Click High > Done.
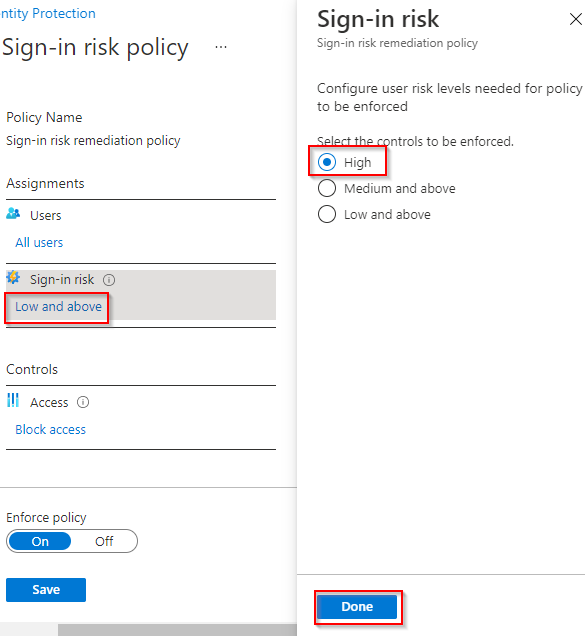
Enabling High risk on sign-in risk policies (source)
5. Click On (original value Off found under Enforce policy). Click Save.
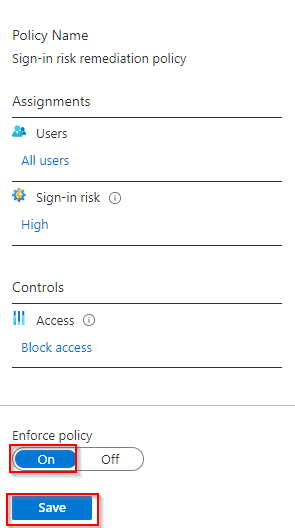
Enabling the sign-in risk policy enforcement (source)
Once the account is blocked due to a suspicious sign-in, the user will receive a block message that is similar to the screenshot below:
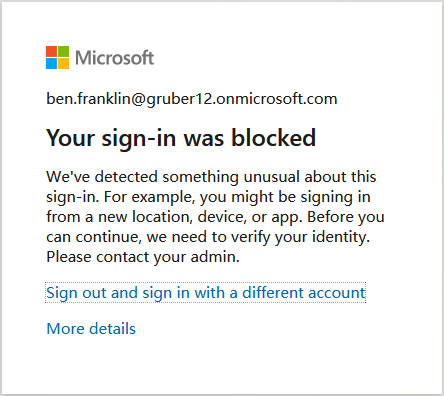
Sign-in blocked due to user and sign-in risk policies (source)
Aligning risk policies with organizational security goals is critical to balancing security and usability. For example, organizations should consider the sensitivity of protected resources when defining risk thresholds. Reviewing policy effectiveness periodically and adjusting thresholds to address evolving threat landscapes is also beneficial.


")
")
")
")
")

")
")
")